Showing posts with label DIY. Show all posts

Thursday, 24 May 2018

Doodle and Me


Doodle and me go back a long way. I am guessing it is something we all did as school students. Yes those designs in the margins of the notebook during class is what I am referring to. A continuous pattern or scribbling our own names or artistic representation of some letters. Yes those exact things that filled the margins of our book and for which we got flak from both parents and teachers.

Now years later I saw my son’s books filled with these scribbles and ofcourse I gave him a piece of my mind. But was reminded of my own school days. So essentially all children do this. Yes I learn a lot from my prodigy [whether I like it or not is irrelevant].

Wednesday, 3 June 2015

Gift wrap and gift cards DIY

Gift wrap and gift cards, yeah this one is a first on the blog. I enjoy trying out different styles of wrapping. I do believe in recycling and reusing. So I save up a lot of gift wraps, ribbons, brown papers etc...

The below is a regular glossy wrapping paper I have used. I do not liked using the coloured surface on top. I use the white/silver part of the paper outside. I stuck a rainbow print wasi tape to bring about spur of colour.

A handmade paper or brown paper with washi tape would also look very pretty. Instead of the washi tape you could try using ribbons.


And now is the time for gift cards. The gift cards available in the stores are too boring and I resort to their use only if I have absolutely no time to create something. Below I have used handmade paper and some stick on glittery sequins. I tried one in the tent form and used a gold thread to secure it to the gift.


Do try try out these and share. I love to hear from you, do drop a line.


Wednesday, 13 May 2015

Accessories for the house, what will you choose?


Hi there! You have already seen glimpses of my house before. As a next step I will share ideas on home accessories today. Accessories can really lift the mood of a dull house. It helps to accentuate, highlight the interest of the inhabitants and make the house more pleasant, warm and welcoming.

There are various types of accessories available in the market. One can choose from a wide range of readily available accessory to DIYs. Before going all out it makes sense to do some small trials and understand one’s personal style and liking. Is the bohemian style really your type or simple rooms with just one or two well-placed accessory? You can always move from little to more. But if you invest in a lot and then not like the effect well it’s a big waste of time, energy and monies, beside you will have a large stock of things you long like.
So really what are the accessories we are referring to? Let’s start with the walls.

Wall: Wall dressing is suddenly very big now and can really make for style statement. There are several wall paints and effects available to choose from, besides wall papers. Then there are paintings, murals, photography etc to choose from. My style is traditional, simple, functional and clutter free. I have kept the walls simple and added handmade mural on one wall and a traditional rajasthani Jharokha on one wall. I am very happy with the effect.

Wall accessories [Mural made by me], Jharoka and durries etc from my house

Plants: I love plants and cannot function without them. Variety of house plants are available like the money plants, succulents, palms, peace lily, and cactus etc.. The plants are a very good option to add colour to a dull room. The colour is of course very pleasing to the eyes. The plants can be kept in pretty ceramic, plastic or brass containers. Plants are the cheapest form of accessories available.
Plants around my house

Flowers: Rely on flower power for instant mood lifting. A variety of flowers are available and suit various occasions. There are the lilies, chrysanthemums, carnations, sunflower, dahlia, roses, marigold etc.. I prefer marigold for festivals. The other come in on and off. As the bouquet grows older and stems shorter I change containers and eventually the flowers are kept as floating flowers. This season is blessed with one of my favourite frangipani which are perfect for floatingJ. I also use artificial flowers in nooks and corners to add colour and just beautiful dull corners.
Flower power for various seasons and reasons


Other accessories: In the ‘other’ category I have brass lamps, brass figurines, ceramic figurines, terracotta objects, shells and conch etc.. These can be used to create vignettes on the centre tables, dining tables 
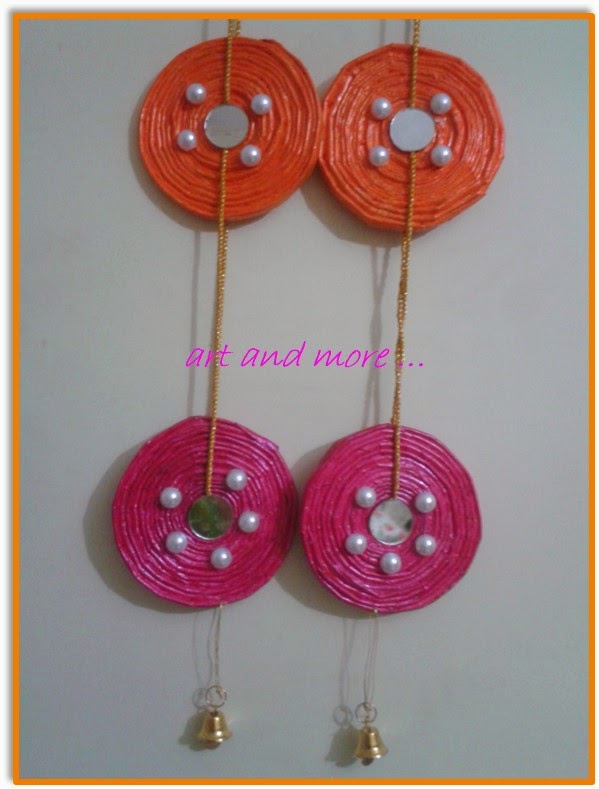
or any surfaces. There are the door accessories in form of bandhdwar [havediscussed a DIY on a post], variety of wind chimes [discussed in a post before] and other wall hanging available.
Bandhdwar, chimes, brass lamps, figurines and conch etc in the house.


Lights: This is yet another type of accessory that is ever evolving. There are thousands of lights to choose from the market. Traditionally we just had the up lights, down lights, table lamps, and chandeliers to choose from. But now in the range of decorative lights the colour material functions of lights have evolved. Wide range of fixtures, LED lights, and pendant lights etc. to choose from, that can bring about drama in a dull ambience. I prefer simple functional lights and my favourite is the sunlight.
Afternoon sun in the kitchen


Drapes and Upholstery: While this is not my personal style I thought it’s a good ideas to list it since a variety of drapes and upholstery are available in the market. I prefer simple light weight curtains and sofa covers. There are sofa dressings also available which again I do not use. But one could explore options in the market and try it. The sofa dressing I think is a great idea to conceal very old sofas. Instead of redoing the entire upholstery the dressings do the job well at affordable pricing.


So yes, you have a wide variety to choose from. Do try out and let me know what your personal style is. I love to hear from you, do drop a line below.

Monday, 20 April 2015

DIY accessory for potted plants

Hi everyone! Like most people living in the metros I too have space constraint and therefore my so called garden is on my window grill. And yes I do struggle to keep my plants alive. The regular stuff like watering, plant food, trimming, rotation basis sunlight etc... does happen. But the difficult one to tackle are attacks from the pigeon and crows!

Somewhere I read that the birds do not like bright colours. So I decided to do a DIY accessory for the plants that will also protect them. 

This one is a very quick DIY. The materials required are pop sticks or regular kulfi sticks, readymade flowers or butterflies made of net and glue. I choose butterfly because I love butterflies.


Procedure: [refer to pic above]

  1. Stick the ready made butterfly to the stick
  2. Allow it to dry and then place it in the pots


I choose bright pink and purple butterflies. Look above don't they look beautiful. Now I just hope the birds don't like them as much as I do.

I used to stick flags of different colours to stick and put it in the pots, also used some of my son's craft stuck it on the sticks and put it in the pots. But I liked this the best.

This one is such a quick and easy DIY that you have absolutely no excuse not to try it. Do try it and share your experience with me. Do let me know if you liked my idea, drop a line below I am waiting :)

Check my other work here. Or simply search for craft and art on the blog.

Thursday, 16 April 2015

Kids book storage DIY

In my last post I mentioned there was an eye soar and that i'd fix it and write a post around it. So here I am with my DIY post. If you remember my post Glimpses of my house, I had created a reading nook for my son. In the rack I had reused old cartons to keep his books. Yup that was the eye soar and I have fixed it :)

Thursday, 18 December 2014

Christmas DIY part II

Hello!! you beautiful people. I hope the last month of the year is treating you well. I know a lot of you the Christmas DIY part I. I do hope you have tried them. Do send me pictures of your trials. As promised I am back with the second part of the Christmas DIY. This post is a savior for all those running late for their Christmas decorations. As always my DIYs are simple, easy and quick to make.

I had visited Ooty during one of summer vacations. I saw pine cone tree for the first time and was elated. I went overboard collecting pine cones. I have a heap of them to say the least. I decided to use them for christmas decor in many ways. Below is the DIY to a ornament.


Pine Cone ornament:

  1. Take two equal sized pine cone, tie them together
  2. Tie a decorative cord through them, to this cord tie bows [green and gold in below pic]
  3. Tan to dan.... the ornament is ready! either use it on the christmas tree or hang it from the ceiling or windows or door etc..

 above ornament made and clicked by yours truly


The snowman has fascinated me ever since I was a kid. Untill I finally experienced snow as an adult and well it wasn't exactly great. I still like the 'thought' of snowman from my memory! I decided to bring that snowman to reality. Below are the steps to making one.


Snowman:
  1. Take a used ketchup bottle with an existing red lid [clean it before use], draw eyes, lips and buttons [shown in picture below]
  2. Take kids clay[orange colour] and make his nose
  3. Tie a bow, red satin ribbon to separate the face from the rest of the body
Here you go the snow man is ready, and looks much better than what I made with real snow :). This is one of the fastest DIY i ever made. It took me less than five minutes to make this one and I enjoyed every bit of it.


Picture of snowman made and clicked by yours truly


I had fun making these decor elements. I want to know if you liked them. Now come on drop a line, I am waiting. If you do get inspired to make any of these, do send me a picture and a line. 


Tuesday, 9 December 2014

Christmas DIY part I

We are in the second week of December and for some reason it just doesn't feel like Christmas. In my part of the world even the proverbial 'nip in the air' is missing. Tried surrounding myself with the colour of the season, but sigh! not much use. Was going through some old pictures. Came across simple Christmas DIY I made last year. This immediately lifted my spirits. Hence I decided to share it on the post here.

Christmas Bells:

One of the important association with Christmas is the Christmas bells. I decided to make them myself. 
  1. Picked thermocol glasses and painted them in red and gold as shown below.
  2. Then I made a hole at the base of the glasses and inserted a decorative thread across each glass. 
  3. At the base of the thread I hung tiny bells [as shown in the right hand side picture below]. 
  4. I then completed the look with a golden lace bow. 


 These bells are ready to be hung from the ceiling of the room or on the Christmas tree, or from the door etc...


Cherry:

Another association with Christmas are the cherries. I didn't really like the ones readily available in the market hence decided to make it myself. I used epoxy bond for the purpose. 
  1. Handcrafted tiny balls for cherry and coloured them red
  2. Next I made the leaves and coloured them green. I decided to make the veins on the leaf with 3D glitter
  3. Tadda its ready [picture below]


These can be either put up on the christmas tree or many such can be made and put at the base of a candle.

I sure had fun making these Christmas decorations. I hope you enjoyed reading it as much. Do drop a line to describe how you liked it. If it inspires you to copy the DIY please do send across a picture of your work, I would love to see it.

Standby for the part II ...


P.S.: Please note, when I made the christmas bells I wasn't aware of the side effects of thermocol on our planet. Please avoid using thermocol for any decoration at all.


Monday, 8 December 2014

Upscaling used plastic containers

Much against our wishes we all use the dreaded 'plastic' in various forms - carry bags, tiffin boxes, storage boxes, readymade food containers, cosmetic bottles, etc... We throw these containers once their utility ends. I thought of trying and upscaling these containers or atleast some of them. Besides I like to facelift old things to enable them new use. 

Below are pictures of some of the upscaled old plastic containers, they are simple self explanatory DIYs. 

In the below picture I have used a curd container. 
  • Cleant it and decorated it with a decorative tape at the base and 3D outliner on the body. 
  • This can be used as a planter or as a container to hold the TV/music system remote controllers or to hold mobile chargers etc...

In the below picture I have re-purposed old moisturiser bottle. The bottle is cleant cut and decorated as per desire. These could be used as mobile charger holder.


I got a brainwave and thought of using the same container as a notepad holder. It can hold a few cut blank paper and a pen.

I am ofcourse very thrilled with my work. I had fun crafting these. Do write to me if this inspires you to follow. 

Click here for some more recycled designs.


Monday, 24 November 2014

Tissue paper holder

.........and the child friendly home saga continues. In the same spirit I decided to make a tissue paper holder. Yes my beautiful ceramic tissue paper holders have broken in the past and I cant go through this pain again, not to even get to the cleaning of the mess part.

Here is my beautiful tissue paper basket woven with old newspaper.

Clearly I am in love with my work hence clicked it from different angles.... :)


In case this interests you, below are pictures of the DIY in a nutshell.

Applying a primer before coloring helps in giving it an even finish. Do drop in a line to tell me what you think of my work, love to hear from you.


Friday, 17 October 2014

DIY Diwali Toran

Toran also called Bandanwaars has a very important place in every Indian Hindu household. Its a decorative hanging over the entrance. Torans are made of many materials viz: Flowers, Mango leaves, Rudraksha, Beads, Wool, Thread work and now the more contemporary acrylic and what not!

Mango leaves are considered to be very very important part of a Toran. These leaves signify freshness, prosperity and an incident free year with the hope of a good harvest [almost forgotten in our urban existence]. For most festivals we do have a fresh flowers and mango toran. 

In addition, I have been looking out for interesting decorative Torans. I have been seeing the same kinds of Toran in the market for many years. Besides being expensive every other person seems to have it. Hence I decided to make one myself.

Used the following materials to do so.
Materials used for making my Toran

Procedure:

  1. Make a paper cutout as shown in the above pic. Place it over a swede or any material and cut out as many mango leaves as needed. 
  2. Next decorate the leaves to make the veins and add flowers to them. [As shown in the picture below]
  3. String all decorative materials together. I have used a golden lace here. [As shown in the picture below]

Close up of the Toran, check the veins, flowers and the golden lace


The final product

And the Toran is ready!! Hang it at the entrance of the main door or on to any entrance or window!

Do drop a line, I would love to hear from you. Incase this post inspires to try it for yourself do post a pic here. It will be great to see your work.


Thursday, 16 October 2014

DIY wall hanging

I have gotten into a great Diwali mood after making this pretty hangings. This DIY is from old newspaper. Do let me know what you think of it. Make it yourself in four easy steps!


 Picture of the wall hanging made by yours truly


Procedure:
Sorry I didn’t remember to click pics at the time of making this piece, but its very easy am sure the instructions will help.
  1.  Make newspaper rolls and then coils [many tutorials available on the net to do so]
  2. Prime and colour the coiled pieces with desired colours
  3. Decorate them with mirrors/kundans/etc [picture shown below]
  4. String them together [close up picture shown below]


 picture of the decoration materials used


Close up of the wall hanging strung together


Use them as wall hangings, window or door hangings. Do drop a line I would love to hear from you.

More Diwali decor and inspiration coming soon!